How to Add More Moodiness to a Photo Using Photoshop's Darken Blend Mode
-
 Loading...
 - Ramos Daniel
- 15 May 2023
- 71 Views
- 0 Like
- 0 Comment
Are you looking to create a more dramatic and moody effect in your photographs? Do you want to add depth and texture to your images? Then look no further than Photoshop's Darken Blend Mode. This powerful tool allows you to darken specific areas of your photo, creating a more somber and moody effect that can add depth and interest to your images. In this article, we will explore the various ways in which you can use the Darken Blend Mode to enhance the mood and drama in your photos.
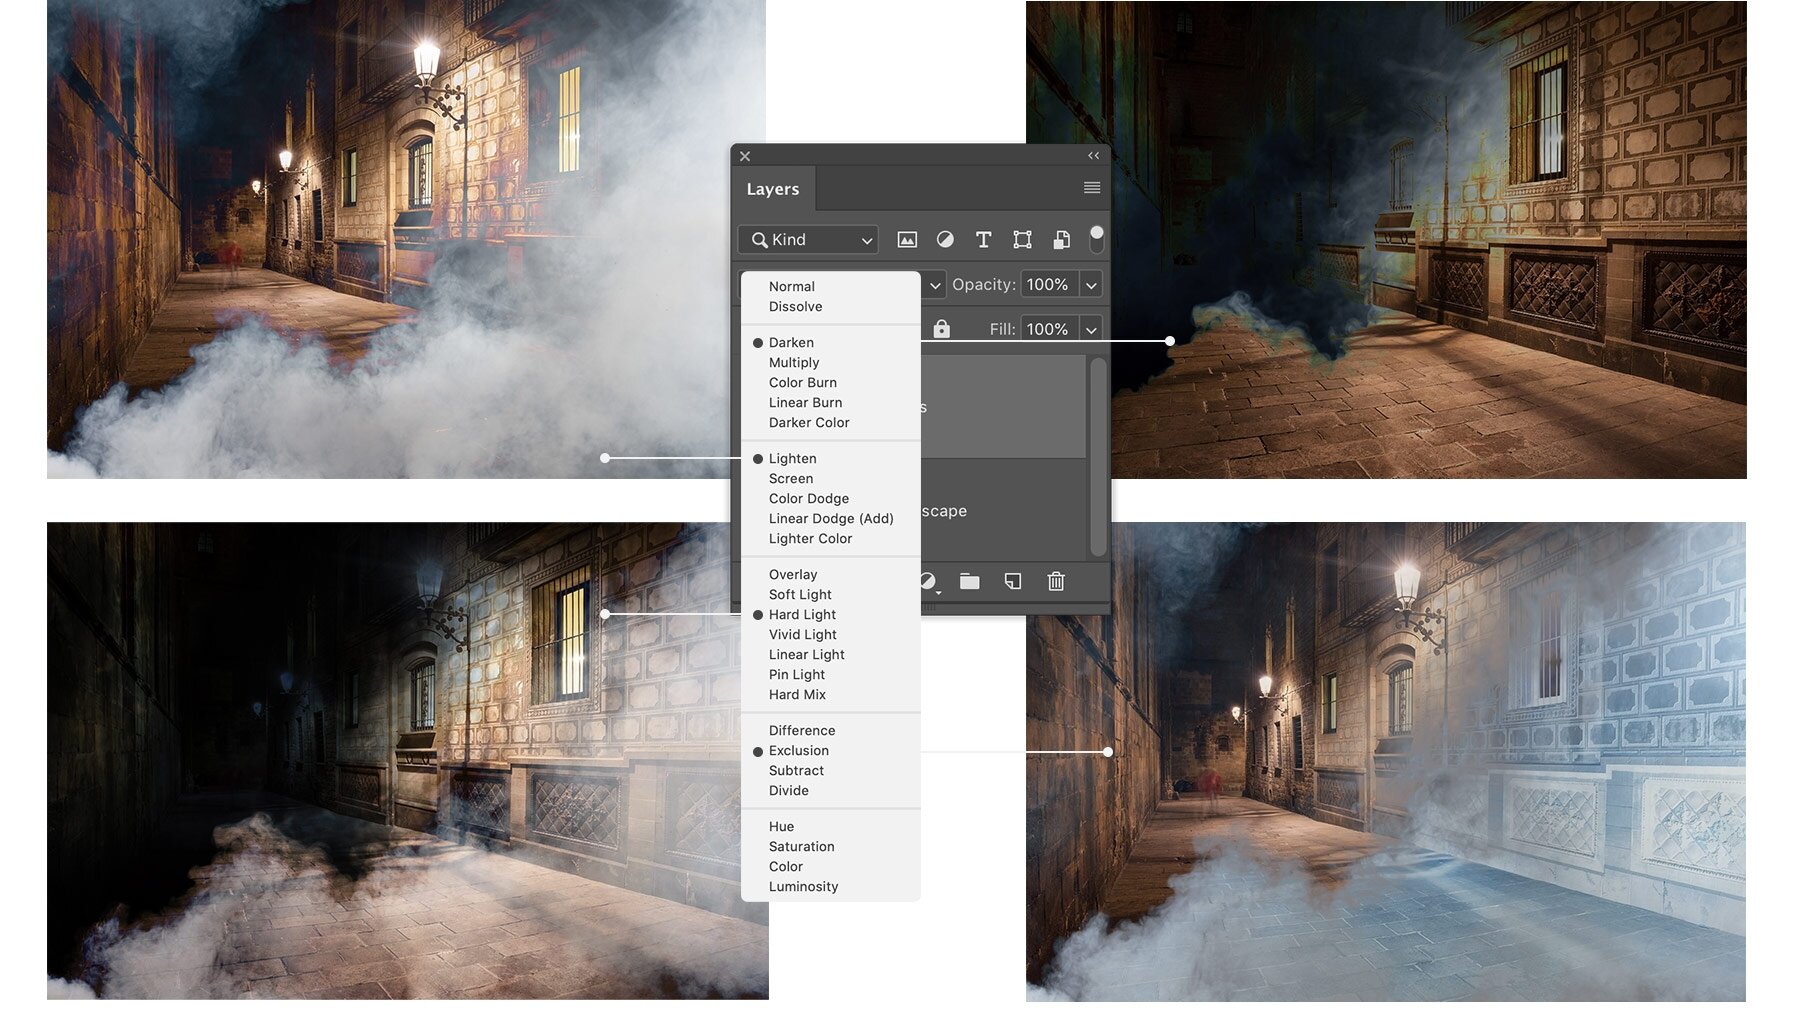
Understanding Photoshop's Darken Blend Mode
Before we dive into how to use the Darken Blend Mode to add moodiness to your photos, it's essential to understand what the tool does and how it works. The Darken Blend Mode, as the name suggests, darkens any areas of your photo that are darker than the blend layer. This means that any pixels that are lighter than the blend layer will be left unchanged, while those that are darker will be darkened to match the blend layer.
Now that we understand what the Darken Blend Mode does let's dive into how to use it to add moodiness to your photos.
Step 1: Open Your Image in Photoshop
The first step is to open your image in Photoshop. To do this, go to File > Open and select the photo you want to work with.
Step 2: Duplicate Your Layer
Next, duplicate your layer by pressing Ctrl + J on a PC or Command + J on a Mac. This will create a copy of your layer that you can work with.
Step 3: Change the Blend Mode to Darken
With your duplicate layer selected, change the blend mode to Darken. You can do this by going to the Layers panel and selecting Darken from the dropdown menu.
Step 4: Adjust the Opacity
Once you have changed the blend mode, you may notice that your image is now too dark. To fix this, adjust the opacity of your layer until you are happy with the overall effect. You can do this by using the Opacity slider in the Layers panel.
Step 5: Add a Layer Mask
If there are specific areas of your image that you want to darken, you can add a layer mask to your duplicate layer. This will allow you to selectively darken specific areas of your photo while leaving the rest untouched. To add a layer mask, click on the Layer Mask icon in the Layers panel.
Step 6: Use the Brush Tool to Darken Specific Areas
With your layer mask added, select the Brush tool and set the foreground color to black. This will allow you to paint on your layer mask, darkening specific areas of your photo. You can adjust the size and opacity of your brush to create a more subtle or dramatic effect.
FAQs
Q1: Can I use the Darken Blend Mode to brighten my photos?
No, the Darken Blend Mode is designed to darken areas of your photo. If you want to brighten your images, you should use the Lighten Blend Mode instead.
Q2: Will using the Darken Blend Mode affect the overall quality of my photo?
Using the Darken Blend Mode can affect the overall quality of your photo if it is not used correctly. It's essential to use this tool sparingly and with care to ensure that you are not over-darkening your images.


