How to Use Curves in Photoshop
-
 Loading...
 - Anika White
- 31 May 2022
- 309 Views
- 0 Like
- 0 Comment
When thinking about the Curves tool in Adobe Photoshop, the phrase “With great power, comes great responsibility” is a thought that comes to mind. Curves is the most powerful tool in Photoshop for adjusting brightness, contrast, tonality, and color.
All that power comes at a price and if not wielded carefully it can easily wreck an image. That’s why it’s best to work on a copied layer or use an adjustment layer when using Curves. With that in mind, let’s dig in.
The Curve(s) Panel

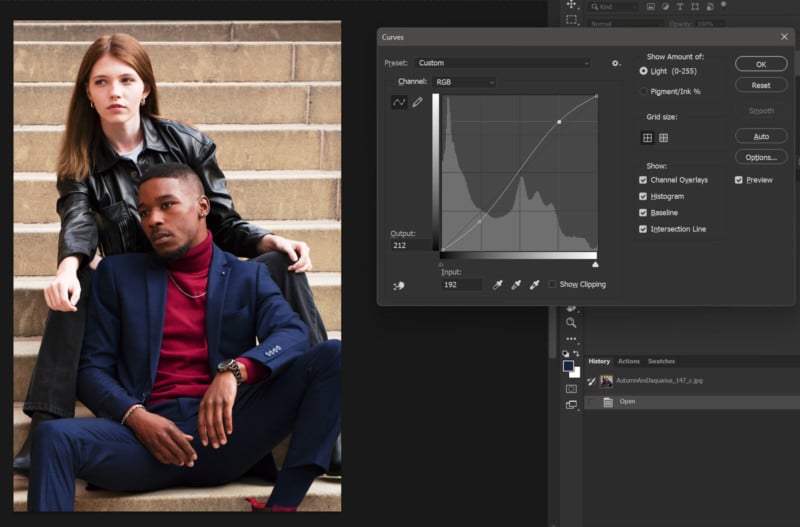
Shown in Figure 1 is the Curves panel as it appears in Photoshop v.23. I’m going to refer to this as the “Classic” Curves panel. This is the one that appears when applying the Curves adjustment to an individual layer. It is accessed from the main menu under Image>Adjustments or by pressing [CTRL+M] on PC or [CMD+M] on Mac.

Figure 2 shows the Curves adjustment layer properties dialogue box as it appears when called from the Adjustments panel. As you can see some options aren’t visible when compared to Figure 1 but they are there if you know where to look.
Note: When using the Curves Adjustment layer, you interact with the controls through the properties window. Most of the controls seen in Fig 1 are visible. Options such as light vs pigment, small vs large grid, and options to view/hide the histogram, baseline, etc are available using the menu in the upper right corner of the properties box. It is important to understand that the adjustments are the same but there are times when you might want to use an adjustment layer versus the classic implementation.
Working with Curves
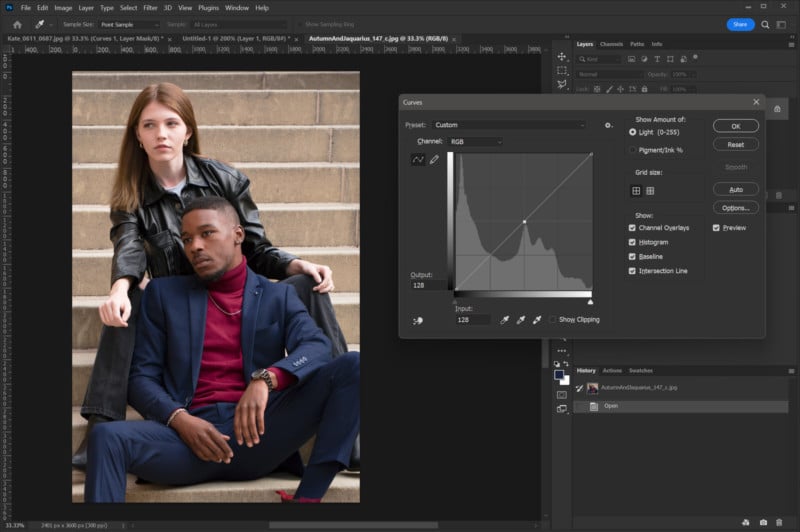
In order to make best use of Curves, you need to understand how this adjustment works. In both Figures 1 and 2, you will see a diagonal line running from the lower left to the upper right of the displayed grid. This line represents the relationship between the tones present in the image/layer (input) and how they are to be adjusted (output).
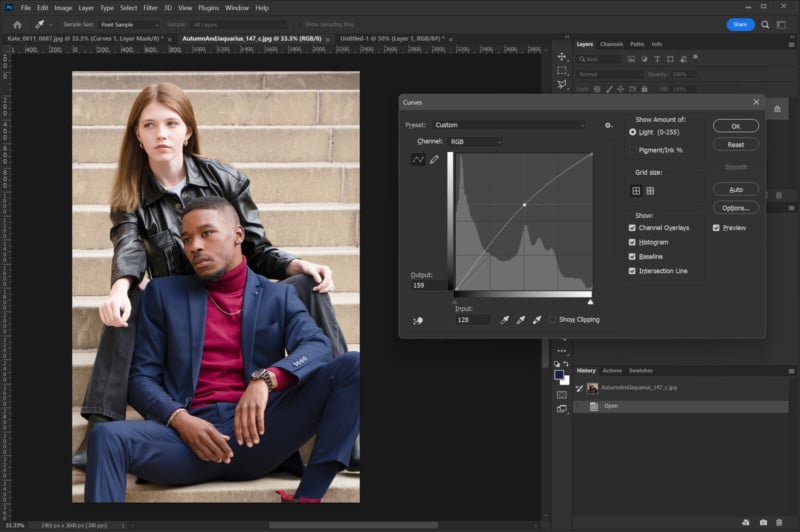
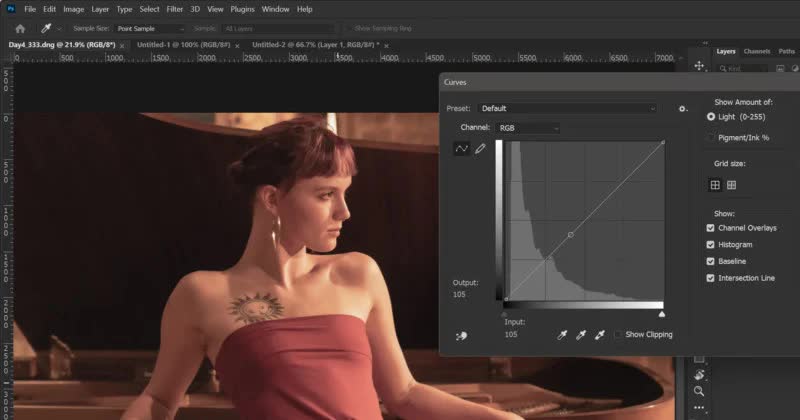
In this example (using RGB mode) the center of the grid the value is 128 (out of 255). By Clicking on that center point and dragging that point upward, the output values will increase. Making this change will have the effect of lightening the mid-tones of the image as can be seen in Figure 3.
Figure 3a. The image before adjustment.
Figure 3b. After raising the midpoint values.
As adjustments are made, the nearby values are also adjusted but to a lesser degree as you move away from the adjustment control point. This creates a gradual change resulting in a curved line from which the Curves tool gets its name.
It doesn’t take much adjustment to create very noticeable changes to your image. In Figure 4 I’ve raised the light tones and lowered the darker tones to create a curve that raises the highlights and deepens the shadows. This correction is often referred to as an “S” curve as the resulting shape of the curve resembles an “S”.
You can see the adjustments don’t appear to move the control points all that much in relation to their original positions. The resulting image shows how the darker tones are very compressed (crushed) and the highlights are “blown out” and have little to no detail.
Since it is very easy to “wreck” an image using Curves, adjustments should be made in small increments. I recommend using the direction (arrow) keys for making adjustments. After clicking on the curve and creating a new control point the arrow keys can be used to move the control point. This is very handy for creating precise changes.
When a control point is created on a curve, that point becomes an anchor. Wherever it is placed on the line that point will remain fixed and as a by-product will affect the shape of the curves to the left and right of it as they will bend to maintain the value at that control point. This can be very useful in protecting certain values from being changed.
Figure 5 shows how the curve shape is affected by multiple control points. The position of the point closest to center affects the overall curve shape and not just the space between two points to the left and right of center. This is done to keep the changes as smooth as possible along the entire curve. Keep in mind I’m only using this curve as a demonstration and I can assure you the image to which I applied this curve looked terrible when I made it. Read More...