Descriptive and Quick Procedures to Use of Canon Comijsetup
-
 Loading...
 - Ashly Wilsin
- 09 Jan 2022
- 426 Views
- 0 Like
- 0 Comment
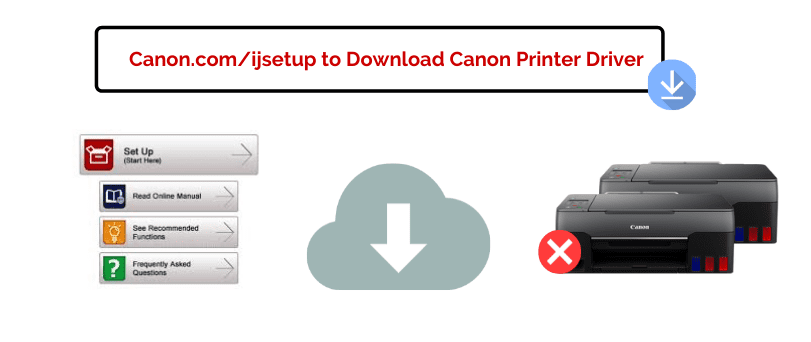
If you just bought a new printer, then you have to set it up via canon.com/ijsetup. Whether you are a new or old use of Canon printers, you have to visit the official website of Canon. It offers the most advanced and efficient printing services, smoothening production, and mind-blowing prints. The first thing you have to do when you purchase a new printer or re-setup your existing printing device is to download the printer driver from www.canon.com/ijsetup.
Hardware Setup of Canon IJ Printer
Move ahead with the setting up of the hardware part of the Canon IJ printer, follow the steps mentioned below:
1. Unpack your Canon printer, turned it ON and connect to Windows computer with USB cable.
2. It will automatically install Canon printer drivers from Windows systems files.
3. Sometimes Windows unable to find printer drivers for your Canon printer model.
4. To download canon printer drivers visit canon.com.ijsetup
5. Type your printer model number, select your operating systems and hit on download.
6. Once diver download will complete close www.canon.com/ijsetup.
7. Open Canon printer drivers’ downloaded file, hit next.
8. Select setup canon printer divers with USB connection.
9. Accept the license agreement, follow the instructions on your computer screen and now your Canon printer is ready to print.
Download and Setup Canon IJ Printer From Canon.com/ijsetup
Download Canon Printer Driver
Canon drivers and software must be the latest to set up a Canon printer, hence follow the given steps and install the latest Canon drivers and software;
Step 1: Launch the web browser and visit the canon.com/ijsetup site.
Step 2: You will now see different options including Set up and manuals. Hence click the “Set Up” tab.
Step 3: Here, either choose the printer type from the given options or enter the direct model number of your model.
Step 4: You can also select the model name and find your product from the bottom.
Step 5: Press Enter or tap on Go and go to the next page.
Step 6: Choose the country/region here and hit Start.
Step 7: Look for the Canon drivers, software, and Firmware, and Choose the setup you need to download.
Step 8: Click Download, save the file, and run the installer by following prompts.
Install Canon Printer
Step 1: Download Printer drivers: Go to canon.com/ijsetup and download the driver according to your printer model number.
Step 2: Select connection type: Double-click on the icon and choose your connection type (USB or Wireless).
Step 3: Power On your Printer: Turn your printer on by pressing the power button.
Step 4: Wireless Connection: To turn on the printer’s WIFI, press the WIFI alarm button.
Step 5: Confirm Connection: If you see the flashing lights (green & blue), then your printer is connected.
Step 6: Read Term & Agree: Now click on the “I agree” button to proceed with the installation. Step 7: Final Steps: click on the finish button to complete the installation
Complete Guide to Canon Printer Wireless Setup on Windows
We here at canon.com-ijsetup.net have the complete solution for those who either have bought a new canon printer or have an older one and facing trouble in connecting them with their device wirelessly. All needed is to follow the instructions through canon.com/ijsetup below in the guide:
1- The very first step is to insert the printer’s power cable into an electric outlet and make sure to turn the switch on.
2- Now, turn the power button on from the printer as well and make sure that the button has been lightened up.
3- The next step is to install the cartridge compatible with your canon printer and insert the paper into the paper tray.
4- Now, as you are done with the hardware setup of the printer. You can proceed further to the Network setup.
5- Just go to the operational panel of the canon printer and press the “Menu” button.
6- Next ahead just choose the option mentioned as “Network Settings” and then select “LAN settings” and press the OK button.
7- Once the OK button is pressed, a list with all the available wireless networks will be displayed on the printer’s screen.
8- Now, choose the desired wireless network you want to connect with and hit the OK button and, confirm.
9- When you see that the device is connected, you are almost done with the process.
10- Now, only what remains is to install the best compatible drivers for which visit canon.com/ijsetup.
11- Enter the correct model number into the search box and click on the search button.
12- Now, click on the start button to start downloading the drivers and installation software for your printer.
13- When you see the software is downloaded, just click on it to install it and once it is installed, you are good to go and print with your printer.
Find How to do Canon Printer Wired Setup on Windows – Canon.com/ijsetup
Here is the step by step guide listed below by canon.com/ijsetup to install canon printers to your device with a wired method. Just follow these instructions to setup your printer easily.
1- At first, just make sure to connect the power cable to the printer and an electric outlet from both ends.
2- Now, turn on the switch from the outlet and the operational panel of the printer and check that the button must have lightened up.
3- Once the printer has been started, just move to your device and visit the canon.com/ijsetup website.
4- After that just go ahead and type in the model number of your printer within the search box and click on the search button.
5- On the next page click on the start button to start downloading the best-preferred drivers and the software for your printer.
6- Now, once the download has been completed just click on the installation file and install the software by proceeding with the steps.
7- As displayed in the steps while installing the software, just connect the USB cable to the printer and the computer as well to complete the installation.
8- After the successful installation of the printer, just try and print a test page.
If the test print worked successfully then click on finish to complete the setup process.
9- The device and the printer are now connected and ready to print.
Once you are done with the driver setup via canon.com/ijsetup, you will have to insert a pile of pages into the printer tray for printing the documents. But it is important to know how to correctly load the pages into the tray for avoiding all the printing errors. If the pages are not loaded appropriately, you will definitely see several kinds of errors on the printer screen such as there is no paper in the printer tray, paper jam issue, etc.
Connect Canon Printer With Wireless Network
1- You can now go to the setup menu on your printer panel, select WLAN setup, and select the wireless network that you want to connect your printer with.
2- Make sure you are choosing the same exact network name that you use to connect your wireless devices at home and the network that your computer is connected with. Now, enter the wireless network password and click on “connect”.
3- You will now see the wireless light will start flashing on your printer and this is an indication that your printer is attempting to connect to your wireless network.
4- Once the wireless lamp is solid blue, it means that it is now connected to the network.
5- Now, on your computer, choose the wireless connection method and it will search for the available wireless printers. You need to choose your Canon printer with the same model number that you have and click on “next”.
6- you can also use iPhone to the printer from ios apps. find settings and an easy guide on how to connect canon printer to iphone and print from phone without trouble.
7- The drivers will be installed and your printer is going to be successfully installed. You can now go ahead and try to print a document to check the printer’s quality and format.
We hope all of this information helps you set up the Canon Printer. do checkout quick guide on ij.start.cannon canon printer not printing even after setup.