Create a Precise Mask Based on Color Value with This Simple Technique
-
 Loading...
 - sonia Mike
- 14 Jun 2022
- 248 Views
- 0 Like
- 0 Comment
Have you ever wanted to make an adjustment that only affects a specific color range in your image? Maybe you’ve tried and failed using Luminosity Masks for this and instead manually painted your selection?
You’re not alone.
Creating a precise mask based on a color isn’t the most talked about Photoshop technique but, luckily for you, it’s not difficult at all. In fact, it only takes a few simple steps.
I often use this technique when working on the color balance of an image. It’s especially powerful for sunset photography, as it creates a much more precise mask than, for example, Luminosity Masks (which target the brightness of a pixel rather than its color) This will be a game-changer if you’ve only used the brush tool to manually create your selections.
It’s simply not possible to get as accurate masks without using this, or a similar, technique.
Create a Precise Mask Based on Color Value
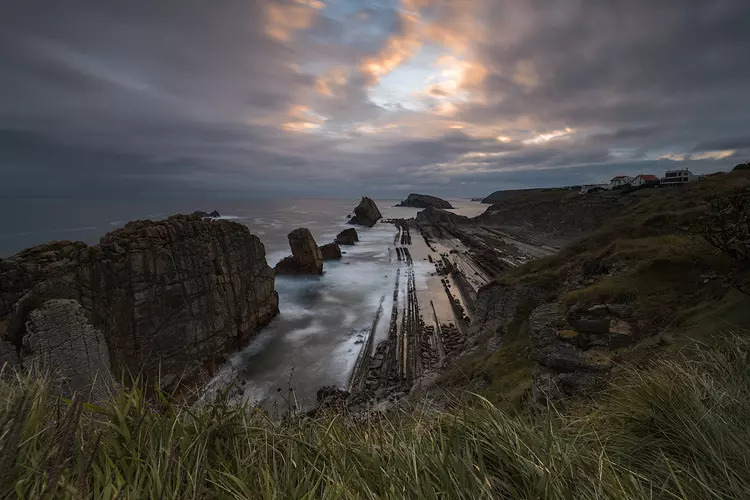
Let’s use the image below as an example. I want to work on the orange & red colors in the sky and add some saturation and contrast to them, without affecting any of the other colors in the image.

So how do you create a mask that only targets the specific color(s) that you want? It’s actually quite simple.
The first thing you’ll need to do is to make sure you create a Merge Visible layer (you can delete this later if you prefer working non-destructive but you’ll need it as a reference point for now). With the merged layer selected, go to Select -> Color Range…

A new window appears when you click Color Range… Here you find all the sliders and settings you need to create the color mask.
The first thing you need to do is to make sure that Sampled Colors is selected from the dropdown list. You can use a solid color or one of the other choices as well but sampling colors will result in the most precise selection.
Beneath the Save button, there are three different Eyedropper Tools. To begin with, we’re going to use the first. With the first Eyedropper Tool selected, click on any color in your image that you want to select. In this example, I chose the brightest and most saturated orange in the sky.

The grayscale preview below the Fuzziness and Range sliders represents the mask that will be created based on the color you selected. The preview is only temporary and the selection isn’t made until you click OK. That means you can change it by clicking on another color if it didn’t target the areas you wanted.
If you’re new to Photoshop and don’t yet know what a mask is, I recommend that you read our article Understanding Layers & Masks in Photoshop. Here you’ll learn that adjustments will only affect white areas of a mask while the black parts will remain untouched. A phrase to remember is: white reveals, black conceals.
To further refine the mask you can use the Fuzziness slider. This slider is used to control how wide the selected range of colors is. Increasing the value will include more of the partially selected pixels and vise versa. I find somewhere in the range of 60-100 works most of the time but this is image-dependant.
If you’ve checked the Localized Color Clusters option (used to create a more accurate selection when using multiple colors) you’ll also be able to use the Range slider. This is used to tell Photoshop how far from the sample points a color should be included. For example, if you have an orange sky but also orange elements in the foreground, you can sample the orange sky and use a low range value to eliminate the foreground from the selection. Read More…