A Guide to Editing an Image in Lightroom From Start to Finish
-
 Loading...
 - Aguino Brisa
- 08 May 2023
- 58 Views
- 0 Like
- 0 Comment
Are you looking to take your photography to the next level? One of the essential steps to achieving this goal is learning how to edit your images correctly. Adobe Lightroom is an excellent tool for beginners and professionals alike to enhance their images. In this guide, we will take you through the process of editing an image in Lightroom from start to finish.
Why Use Lightroom for Image Editing?
Lightroom is a powerful photo editing software that allows you to adjust various aspects of your images, including color, exposure, and sharpness. It is the go-to choice for many photographers because of its user-friendly interface and wide range of editing tools. Lightroom is also non-destructive, meaning it won't overwrite your original image, and you can always go back to the original if needed.
Importing Images into Lightroom
Before you can start editing your images, you need to import them into Lightroom. Here's how to do it:
Open Lightroom and select "Import" from the bottom left corner of the screen.
Choose the location where your images are stored and select the images you want to import.
Select the appropriate import settings, including file type, file name, and destination folder.
Click "Import."
Once you have imported your images, you are ready to start editing.
A Guide to Editing an Image in Lightroom From Start to Finish
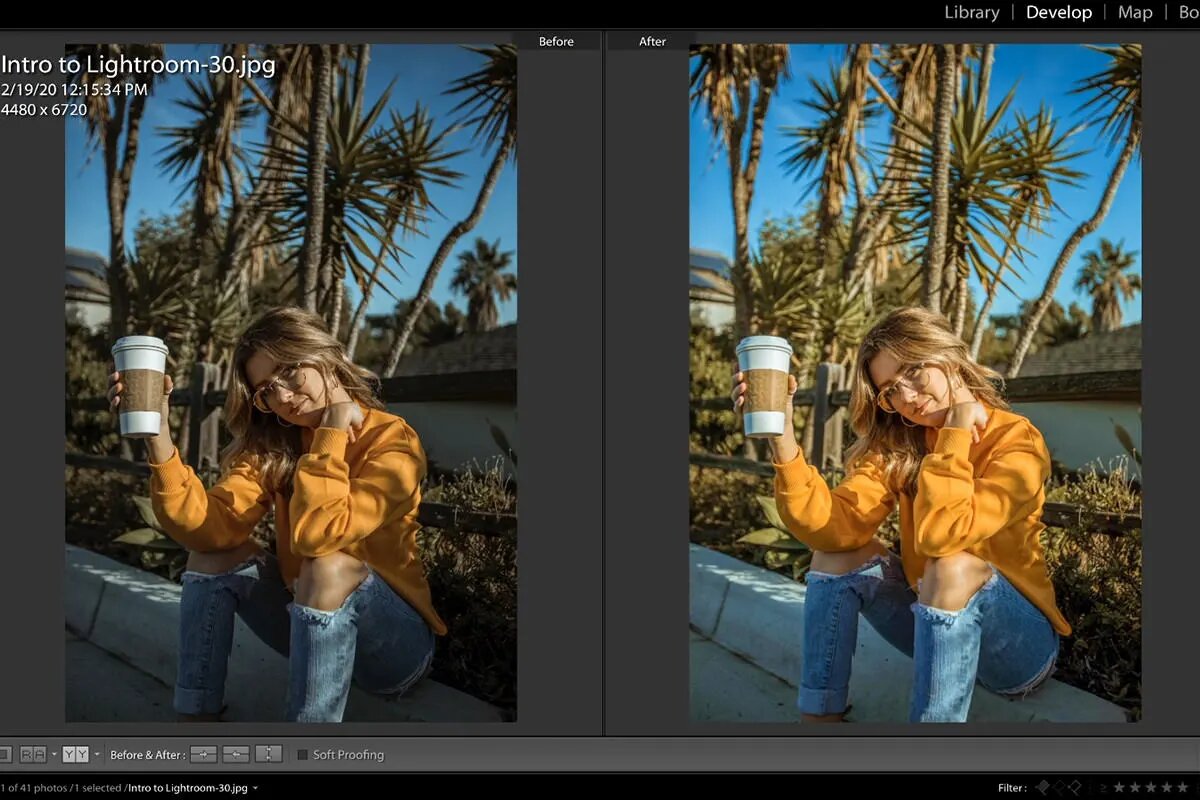
Step 1: Basic Adjustments
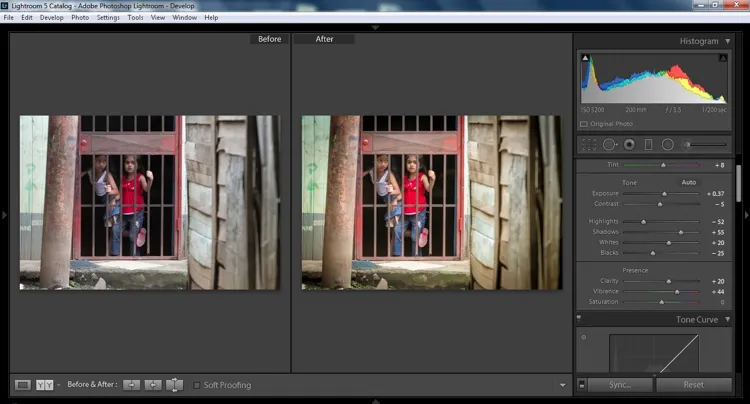
The first step in editing your image is to make basic adjustments. Here's how to do it:
Select your image from the Library module and go to the Develop module.
Click on the "Basic" panel on the right-hand side of the screen.
Adjust the exposure, contrast, highlights, shadows, whites, and blacks sliders to achieve the desired look.
If necessary, adjust the white balance to correct any color casts.
Step 2: Color Adjustments
The second step in editing your image is to make color adjustments. Here's how to do it:
Click on the "HSL/Color" panel on the right-hand side of the screen.
Adjust the Hue, Saturation, and Luminance sliders to achieve the desired color balance.
Use the adjustment brush tool to make localized color adjustments, such as changing the color of a specific area in the image.
Step 3: Detail Adjustments
The third step in editing your image is to make detail adjustments. Here's how to do it:
Click on the "Detail" panel on the right-hand side of the screen.
Adjust the sharpening and noise reduction sliders to achieve the desired level of detail.
If necessary, use the spot removal tool to remove any unwanted spots or blemishes in the image.
Step 4: Lens Corrections
The fourth step in editing your image is to make lens corrections. Here's how to do it:
Click on the "Lens Corrections" panel on the right-hand side of the screen.
Enable the "Enable Profile Corrections" checkbox to correct any distortions caused by your lens.
If necessary, use the manual adjustment sliders to make further corrections.
Step 5: Effects Adjustments
The fifth step in editing your image is to make effects adjustments. Here's how to do it:
Click on the "Effects" panel on the right-hand side of the screen.
Adjust the vignette and grain sliders to achieve the desired look.
Step 6: Exporting Your Edited Image
Once you have finished editing your image, you are ready to export it. Here's how to do it:
Click on the "Export" button in the bottom left corner of the screen.
Choose the location where you want to save the exported image.
Select the appropriate export settings, including file type, file name, and image quality.
Click "Export" to save your edited image.
Congratulations! You have successfully edited and exported your image in Lightroom.
FAQs
Here are some frequently asked questions about editing images in Lightroom:
Q1: Is Lightroom difficult to learn?
A1: While there is a learning curve when it comes to using Lightroom, it is generally considered to be user-friendly and easy to navigate. With practice, you can become proficient in using it to edit your images.
Q2: Can I undo my changes in Lightroom?
A2: Yes, Lightroom is non-destructive, which means that you can always undo any changes you have made to your image and revert it back to its original state.
Q3: Do I need to be a professional photographer to use Lightroom?
A3: No, Lightroom can be used by anyone, regardless of their level of photography experience. It is a great tool for beginners and professionals alike.
Q4: Can I use Lightroom to edit RAW images?
A4: Yes, Lightroom is designed to work with RAW images, which are uncompressed and contain more information than JPEG images.
Q5: What are presets in Lightroom?
A5: Presets are pre-made settings that can be applied to your images to achieve a specific look or style. Lightroom comes with several built-in presets, and you can also create your own.
Q6: Can I edit multiple images at once in Lightroom?
A6: Yes, you can edit multiple images at once in Lightroom by selecting them and making adjustments in the "Develop" module.
Editing your images in Lightroom can make a significant difference in the final product, and it is a great way to enhance your photography skills. By following this guide, you can learn the basics of editing an image in Lightroom from start to finish. Remember to experiment with different settings and techniques to find your unique editing style.


